Article 4 of 12 – Study Sash Profile, locate Profile router bits & Research; Crafting a Custom Profile Blade
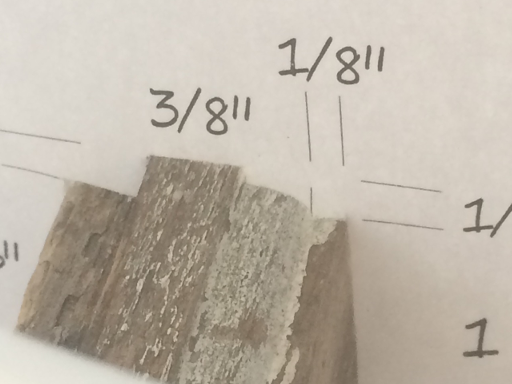
February 18th – Study Sash Profile, locate Profile router bits: With the US/Lower Rail having lost both tenons, I decided to craft a new Rail. I began researching options to cut the profile needed in order for the coped joints to meet properly. I measured it for profile dimensions and drafted it to scale in Inkscape. Then, printed/cut-out and slipped US/LR through to determine suitability of Eagle router bits. As predicted, it was not an exact match but, very close. Considering the expense of the bits, I decided to first attempt to create my own custom profile blade instead.
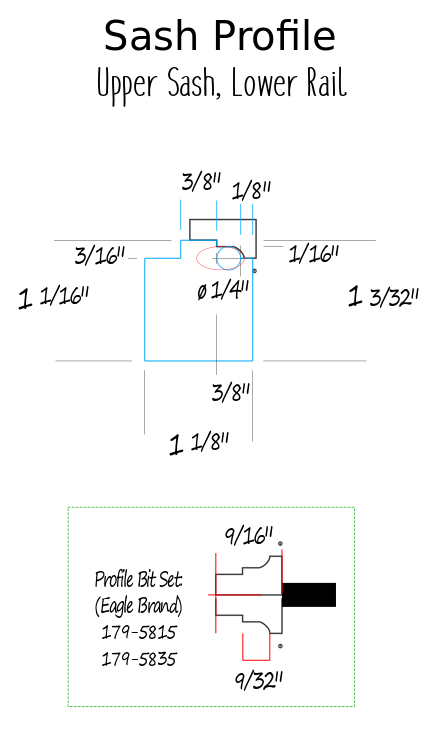
Left: Drafting of window profile (using “InkScape,” an OpenSource program that works similar to Adobe’s Illustrator.)
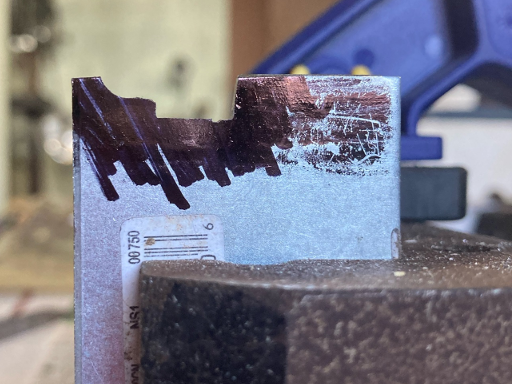
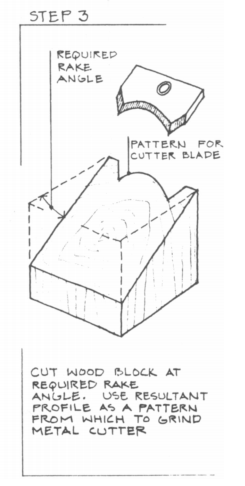
February 20th – Research; Crafting a Custom Profile Blade: Reading APT’s cutter blade instructions (Nelson, “Simplified”, Pg 49), I learned that I could ultimately produce a blade designed to be inserted at 50° into a hand plane. But, because I had only thin steel that was most likely not hardened, I chose to follow John Leeke’s video and made a paint scraper blade instead. (Leeke, “Window Sash”) Using my steel, I was quickly able to grind out the basic shape that I then refined with flat & “rat tail” files. I was shocked at how quickly I crafted a matching edge. Note: the squared profile section acted as a straight edge, allowing my scraper blade to run along the topmost ⅜” wide surface of the Rail.
Below: In progress shaping my custom profile scraping blade using black Sharpie® marker as contrast during crafting.